|
データシートサーチシステム |
|
|
データシートサーチシステム |
|
E5CC-RX2ABM-000 データシート(PDF) 128 Page - Omron Electronics LLC |
|
|
|||||||||||||||||||||||||||||
E5CC-RX2ABM-000 データシート(HTML) 128 Page - Omron Electronics LLC |
|
|
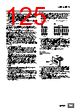
128 / 138 page  E5 @C/E5@C-T 128 Removing from the DIN Track 1. Remove the Main Unit from the Terminal Unit. 2. Remove the Terminal Units. 3. Remove the Terminal Units from the DIN Track. Mounting to a Panel in Connection 1. Insert the main unit into the mounting hole in the panel. 2. Mount the previously rewired terminal unit to the main unit. 3. Push the adapter from the terminal unit side until it comes into contact with the panel to temporarily secure the unit, and then tighten the two fastening screws on the adapter. Alternately tighten the two screws little by little to maintain a balance. Tighten the screws to a torque of 0.29 to 0.39 N·m. 4. On the wired terminal unit, remove the connector cover on the side to use for connection to another terminal unit, and then connect the units together. 5. Insert the main unit into the mounting hole in the panel, and then mount the terminal unit. 6. Push the adapter from the terminal unit side until it comes into contact with the panel to temporarily secure the unit, and then tighten the two fastening screws on the adapter. Alternately tighten the two screws little by little to maintain a balance. Tighten the screws to a torque of 0.29 to 0.39 N·m. Removing from the Mounting Panel 1. Remove the Adapter attached to the Main Unit. (1) (2) (3) Adapter Mounting panel Adapter (3) (1) (2) (3) (4) (5) Adapter Adapter (6) (6) (1) (1) Adapter Adapter |
|
リンク URL |
| ALLDATASHEETはお客様のビジネスに役立ちますか? [ DONATE ] |
Alldatasheetは | 広告 | お問い合わせ | プライバシーポリシー | データシートへのリンク | リンク交換 | メーカーリスト All Rights Reserved©Alldatasheet.com |
| Russian : Alldatasheetru.com | Korean : Alldatasheet.co.kr | Spanish : Alldatasheet.es | French : Alldatasheet.fr | Italian : Alldatasheetit.com Portuguese : Alldatasheetpt.com | Polish : Alldatasheet.pl | Vietnamese : Alldatasheet.vn Indian : Alldatasheet.in | Mexican : Alldatasheet.com.mx | British : Alldatasheet.co.uk | New Zealand : Alldatasheet.co.nz |
|
Family Site : ic2ic.com |
icmetro.com |
 Japanese ▼
 English
 Chinese
 German
 Japanese
 Russian
 Korean
 Spanish
 French
 Italian
 Portuguese
 Polish
 Vietnamese
 Indian
 Mexican
 British
 New Zealand